How To Take a Screenshot on Chromebook?

To all the people who typically use Windows or macOS, Google’s Chrome Operating System might look and feel very different from all of you, right? Take a Screenshot on Chromebook.
Chromebooks are one great inexpensive alternative to Windows and Mac laptops. =
Though they do require an internet connection to do most of the things for you, that isn’t the only difference, right?
Just for all the people who are going to jump off their windows laptop and buy a Chromebook, I need to tell you that you won’t find a Print Scr key here, which is traditionally used to take a screenshot on a Chromebook laptop or desktop.
There are times when you just want to show someone else the thing that is on your screen. And in this case, taking a screenshot is the easiest thing to do believe me.
All the people who want to capture screenshots on your Chromebook, you are in luck, as in this article I will be telling you how to do that.
There are a few different ways to take a screenshot on Acer Chromebook, so without any further wait, let’s run through them right now.
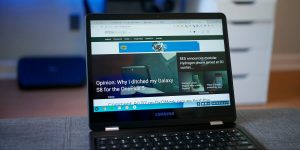
How to capture a full screenshot on your Chromebook?
![]()
To take a screenshot on google Chromebook of each and everything on the screen, you just have to press the following keys at the same time:
CTRL + SWITCH WINDOW

If you guys are wondering which one is the Switch Window button on your Chromebook, then it is typically located in the top row of the keyboard and between the Full-screen button and Brightness down button.
The switch window button resembles a rectangle that is followed by two lines.
The moment you press both of these keys at the same time, a notification will appear in the bottom right corner of your screen displaying a thumbnail of the screenshot you just took.
If you click on that thumbnail, it will lead you to the folder named Downloads.
Every screenshot you take goes into that folder by default, making them all accessible offline for all the users.
You also can access this Download folder by clicking on the blue folder icon that is located on the taskbar.
Chrome operating system labels all the screenshots with the date and time according to when they were taken.
Take a Screenshot on Chromebook Manually
Since Chrome operating system saves all the screenshots locally on your device, they won’t be available for you on Google Drive unless you want to upload them to the cloud manually.
If you want to do so, just follow the steps I have mentioned below:
- Select the screenshot that you want to upload to Cloud.

- And if you want to upload multiple screenshots, then click on the check icon on each screenshot of yours.
- After you select them, click on the Share button that is located in the top right corner of your window.

- You will see a drop-down menu, click on the option that says Save to Drive, And you are done.
Capture a partial screenshot on your Chromebook

Now I will tell you how to capture a specific portion of your screen.
In case if you want to share just a particular area of your screen and don’t want anyone else to see the whole of your screen, this option is the one to go for.
Follow the steps mentioned below to do this:
- Hold down the Ctrl and Shift buttons at the same time, then press on the Switch Window (I have described above where this button is situated)
- The screen will dim and the cursor will change into a crosshair temporarily. With that cursor, you will have to click and drag a square across the portion of the screen that you want to capture the screenshot of. After you select that particular area, just release the mouse button.
The partial screenshot you just took will be saved to the Downloads folder.
Screenshots in Chromebook Tablet Mode
Use the buttons

Many Chrome is operating system-based 2-in-1s and tablets that may not be having immediate access to any keyboard.
You don’t have to worry about, because there is an easy way to capture a screenshot in tablet mode.
You will have to press the Power + Volume Down button at the same time. Your screen will register the screenshot and take an image of the entire screen as it is at that moment.
Using a Stylus – Full Capture
You can use a stylus to capture a screenshot of the entire screen of your Chromebook in Tablet mode. Just follow the below-mentioned steps:
- Tap on Stylus
- Then you can use the stylus to tap the Capture Screen This will capture a screenshot of the entire screen of your Chromebook

Using a Stylus – Partial Capture
If you want to capture only a specific area of your screen, then follow the steps that I have mentioned below:
- Tap on Stylus
- Then use the stylus to touch and hold the starting point from the area you want to capture a screenshot of your screen.
- Then drag your stylus to the final point until where you want to cover up the screen for the partial screenshot. It will most likely look like a box.
- Just release now, and the screenshot will be captured of the particular area that you selected only.
This is how you take a screenshot on your Chromebook. And if you want to simply copy a screenshot of yours, just watch the notification that appears above the system clock.
Then click on the button that says Copy to clipboard, then press Ctrl + V buttons whenever you want to paste it anywhere.
Another way to do this is to find the screenshot on your Chromebook, and just simply copy it to the clipboard by pressing Ctrl + C and then paste it by pressing Ctrl + V keys, just like on windows.
More visit: AmazeInvent
There you go, my friends. I hope this article was helpful to you in every manner that you wanted it to be.
Helpful way: here

How To Import Vcard 2.1 to iCloud?

How To Wave On Facebook And Facebook Messenger
How To Download Google Home App for PC
About The Author
Mujeer
Mujeer is living in Pakistan. He has worked as a journalist for nearly a decade having manager authority on several large publications including Techs and the AmazeInvent. As a manager for AmazeInvent, he covers national and international developments.