All the people who are very much into these games probably think that what their life would be if some early PC adventure games such as the King’s Quest and Space Quest weren’t created by Sierra. Let’s create a point and click adventure game.
They further think that where would they be if there were no classic Lucasarts games like the Secrets of Monkey Island.

For all the guys who are new to this point and click the category of gaming, I will tell you what these point and click games are before I start with the procedure.
Point and Click Games

The point and click game category are quite common among all types of games, even after the fact that this category was declined for some time, but the popularity of mobile games nowadays have has renewed and enhanced this genre while providing new opportunities to all the designers.
Well, particularly this point and click category refer to a type of adventure game. In this game, the user can interact mainly with a mouse or any other pointing device, such as a finger on mobile phones.
I should tell you if you know or not but point and click the type of games require only minimal knowledge about computers because it is very easy and simple to use even for all the casual players if you compare this game with 3D-FPS or any other game in which you will have to use a mouse with 100 buttons to survive.
To make this point and click game as simple and easy as it possibly can be, all the interactions in this game are generally made of click, double click, and drag and drop. That is all the control you need to know if you are playing this game.
Download and install

Just go to the Adventure Game Studio website and download the latest version of the software – at the time of writing, this is 3.4.0 Patch 4.
You will also need to get yourself a hold on to the Visual C++ 2008 Service Pack 1 Redistributable which is used to deal with several back-end requirements for Adventure Game Studio (AGS).
Just install that first, and then run the AGS installer. Now leave everything selected when you are given options, click on next all through the rest of the installer, and click on install when it is prompted.
Then click the Finish button to launch the software for the first time, and click on Continue to start creating a new game.
Set up a project
The new game wizard will allow you several options that you are free to take on experiments with.
For this tutorial, I will just stick with the simplistic Beneath a Steel Sky-style interface (LW_BASS_v2.0) which uses two buttons such as left click to interact, and right-click to examine.
This cuts down on the difficulty – if you choose for a Lucasarts 9-verb template, then you will have to do a lot of writing.
Now enter a name for your game, a filename, and click on Finish to finalize the setup for your new game.
Click on Build > Run to see the sample of the content which is included and get a feel for what the interface can do.
Make a room

Rooms are the place where the action in your game takes place. To add a room, go to the ‘Explore Project’ Pane which is on the right-hand side of the interface, and expand ‘Rooms’, right-click ‘1:’, and delete the basic pre-installed room.
Now right click ‘Rooms’ and insert a new room with the Blank Room template. Now click the plus icon to expand your new room, after that double click on ‘edit room’.
Click on the ‘Change’ button and find your room artwork. I have chosen one of the images from the Instagram pack but I suggest you make your own point and click adventure game and save it in PNG format before importing it.
Room properties

Let us tell Adventure Game Studio that how to handle the room. Just start by using the drop-down box which is above to show the room’s edges, and then drag these to match the limits of your room.
Use the same box to choose ‘Walkable areas’ and use tools in the toolbar which is above to mask off the areas which you want your character to be able to pass through. Click and drag it with the right button to erase.
Use the drop-down box to show the room’s hotspots. These are the things which your player could mostly interact with, examine it, or else otherwise it deserves mentioning.
Paint them as you did to the walkable areas, choosing different hotspots with the drop-down box above properties on the right.
Make sure to rename each one of these with a description and a name which begins with ‘h’ – for example, our bed, will have the design name hBed. AmazeInvent may help you.
Event coding

We do have to make a thing happen when we do a thing. The simple and easy way to demonstrate this is to have our character say something when we interact with a hotspot.
Now click the lightning bolt icon which is above the hotspot properties to see the Events panel and, next to ‘Look at a hotspot, just click on the ellipsis button.
You will then have taken to a scary-looking but not that scary coding panel, with the edges of a routine which have already put in place.
Now hop right back to the room tab and add an event for interacting with the hotspot just like the same way.
Now, to get the main character to say something, just enter a line in the following format between those curly braces which is representing each event:
player.Say(“I am saying something.”);
Everything here is important, from the capitalization to the brackets to the quotes to that infuriating semicolon which is at the end.
If you want your character to say multiple lines, just put another player. Say command in the next line. Be sure that everything is within those curly braces. Make your own: Here
Test and tweak

A main part of development is testing. At any time, you can see how your adventure is shaping up by hitting the small play button on the upper toolbar to launch your game.
If any of your code is wrong, you won’t get this far: Adventure Game Studio will alert you as to what it had found wrong, and you will need to poke around fix that.
More rooms
Our very own character wants somewhere else to go.
Just set up a new room, as we have done before, head back to your original room and draw a new hotspot by the doorway, first choosing a new entry at the top of the properties window – if you don’t do this, anything which you will draw will be added to the hotspot on which you were working on originally.
Now that we are creating an exit, let’s note that where it is: get the x,y coordinates for this by hovering your mouse over your room an noting the numbers which are above it – this (mostly) refers to the bottom of your character’s feet, so keep that in mind.
Add a bit of interact script and before writing any code, jump to your second room and work out the coordinates at which you want your character to appear. Head back to your first room’s script and add something like this between the door’s interaction’s curly braces:
player.Walk(168,193, block);

player.ChangeRoom(2, 100, 50);
This will walk you the player to specify coordinate, waiting – all thanks to the block argument – until the player has walked to the point to continue with the script, it will then send the player to sprite to room 2, at the fitting coordinates and as it is out player character, the game will also switch room.
After you are done with each and everything mentioned in this article just the way I have described it, I should tell you that you are good to go with the game, my friend.
After all these steps, you can make friends, by creating other characters, and then add a great view overall to make the game super good.
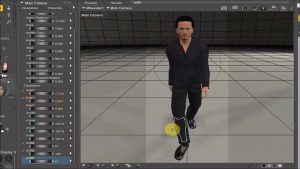
You also will have to select the specific sprites which will represent the walking, talking, and performing other actions of your character. You will just have to right-click on ‘views’ and then select the ‘New View’ option.
Last, you will have to have a chat, because interacting with the new character you build doesn’t result in an awful a lot at this time, to be honest.
You will have to right-click on the dialogs section and select ‘New Dialog’.
Official guide: here