
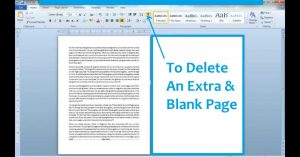
Remove text you do not need anymore.
While no action erases a page from a Microsoft Word document, you can without much of a stretch remove all the text on that page with the Delete or Backspace key on your console.
To start with, however, utilize the Show/Hide capacity to see precisely what you need to remove.
A large portion of us – regardless of whether understudies, office workers, craftsmen, or researchers – use Microsoft Office, delete a page in word Mac, and all the more explicitly, Microsoft Word, in our day by day lives.
It’s everybody’s go-to programming suite for efficiency and in light of current circumstances. Its list utilizations are amazingly dependable and exceptionally incredible profitability devices that fill some needs.
However, a colossal level of its clients doesn’t understand exactly how groundbreaking they are. How about we take Microsoft Word, for instance.
While it is intended to cause word handling to feel progressively like a walk around the seashore instead of a repetitive undertaking with its catches, mechanized capacities.
How to Delete a Page in Word?
Thus they wind up making such a large number of strides and a more extended time than would normally be appropriate to do the more mind-boggling undertakings.
While erasing a page in Word, for instance, a few clients wind up giving their mouse and delete button somewhat of an exercise, all since they don’t know that there’s a progressively consistent approach to do it.
In case you’re one of those people, you’ve gone to the perfect spot. Today, we’re going to show you a few progressively effective approaches to erase a page in Word, regardless of whether you’re a Windows 10 or a Mac client because truly, your delete key needs a getaway.
How to erase a page in Word on Windows 10?
Psyche you, there’s no catch you can simply tap on to mystically erase a page. All things considered, there are better, also increasingly proficient, ways other than holding your delete key.
Method# 1: Go to Work
Microsoft Word’s Go-To work allows your cursor to cursor, rather than look, to a page, area, lime, or the reference you indicate, fundamentally to spare you time.
Consider it teleportation – rather than you strolling to a store to purchase a pop, you vanish from your present area and show up at your strolling to store to purchase a pop, you vanish from your present area and show up at your goal.
At the point when you need to erase a page in Word, the Go to work not just ‘transports’ your cursor to the page you need to erase, but it likewise lets you feature the substance of the page, basically preparing it for erasure.
Stage 1: On the Home tab, click on the Find drop-down fasten and choose Go to. Or on the other hand, essentially press Ctrl+ G.
Enter page number
There, you can bounce to the page you need to erase by composing in its page number.
If you don’t have a clue about its particular page number, you can likewise type in + or – to hop from the page you’re presently on to the page you’d prefer to erase.
For instance, in case you’re on page 1 and the page you’d prefer to erase is four pages down, you essentially type + 4. Doing so will take you to that page you determined.
Composing the content “\page” in the Enter page number content box and clicking GO to feature the whole page you wish to erase.
Press Delete or erase to erase the page.
This adequately erases the entire page.
More visit: AmazeInvent
Method# 2: Navigation Pane (for close pages)
Utilizing the Navigation Pane’s Thumbnails Pane tab permits you to see and rapidly look through your report’s pages by giving you access to their thumbnails.
This element lets you easily get through your record, rapidly find the page you need to erase, and double-ta on it so you can bounce to the real page.
This strategy is particularly valuable when you incidentally made a lot of clear records, regardless of whether by coincidentally holding the Space Bar or including a page break.
The Navigation Panel lets you effectively figure out which pages are clear and hence need cancellation.
Stage 1: Go to the View tab and click off the Navigation Pane box or essentially press Ctrl + H and snap on the Pages tab in the Navigation Pane.
Opening the Navigation Pane, generally fastened on the left–hand side of the application window, and tapping on the Pages tab will the thumbnails of your report pages together.
Stage 2: Scroll through the pages, at that point discover and double-tap on the clear page you’d prefer to erase
This should you to the start of the close page.
Stage 3: Press Ctrl + Shift + 8 to show the section marks. On the off chance that it’s an additional section (or five) that made the clear page show up, essentially press erase until the page is erased, which shouldn’t take a ton of time.
If the clear page was brought about by a Page Break, essentially select Page Break and press delete.
How TO erase a page in Word on Mac?
Erasing a page in Word on Mac is fundamentally the same as when you’re going on a PC.
There are, be that as it may, a couple of glaring contrasts principally due to Mac OS’s particular arrangement of alternate way keys just as the application’s somewhat extraordinary UL.
Technique# 1: Go to Work
On the off chance that you haven’t read the area for Windows 10, at that point how about we do a fast boost?
The Go-to allows your cursor to cursor, rather than look, to a page, segment, or line you indicate, as though transporting the cursor to that area to spare you time.
The Go to work not only ‘transports’ your cursor to the page you need to erase, but it likewise lets you feature the substance of the page, preparing it for cancellation.
Stage 1: On the Main Menu, go to Edit> Find and select Go to. Or then again essentially press Fn + CMD + G.
This should open the Go to in the Find and Replace discourse box.
Stage 2: Type in the page number in the Enter page number content box and snap Go to
You can hop to the page you need to erase by composing in its page number, on the off chance that you don’t have a clue about the page number, you can likewise type in + in or – hop from the present page to the one you’re searching for.
For instance, in case you’re on page 1 and the page you’d prefer to erase is four pages down, you type +4.
Stage 3: Type ‘\page’ at that point click Go to feature the entire page. Snap Close the content is featured.
Composing the content ‘\page’ in the Enter page number content box and clicking Go to feature the whole page you wish to erase.
Stage 4: Press erase to erase the page
When the entire page has been featured, essentially press erase the entire page in one swoop.
Method# 2: Navigation Pane (for clear pages)
Utilizing the Navigation Pane’s Thumbnails Pane tab permits you to see and rapidly look over your record’s pages by giving you access to their thumbnails.
This component lets you easily finish your report, rapidly find the page need to erase, and double-tap on it so you can hop to the real page.
This strategy is particularly valuable when you’ve incidentally made a lot of clear records, regardless of whether by coincidentally holding the Space Bar or including a page break.
The Navigation Panel lets you effectively figure out which pages are clear and subsequently need to be ensured.
Stage 1: On the View tab tick off the Navigation Pane box. Snap on the Thumbnails Pane (first tab) in the Navigation Pane.
The Thumbnails Pane, which commonly shows up on the left–hand side of the window, shows the thumbnails of your report pages all together.
Stage 2: Scroll through the pages to locate the clear page you’d prefer to erase. At that point when discovered, double-tap on it to move your cursor to the start of that page.
Stage 3: Press Cmd + 8 to show the section marks. On the off chance that it’s an additional section (or five) that made the clear page show up, essentially select the passage stamps and press erase.
On the off chance that the clear page was brought about by a Page Break, select Page Break and press erase.
What is the alternate way to erase a page in Word?
Snap the cursor where you need to include a page and press “Ctrl-Enterer.” To erase a page, press “Ctrl – Backspace.”
You may need to press “Ctrl – Backspace” on different occasions if there are things on the page you are attempting to erase.
How would you duplicate a page on a word?
- Duplicate a page in a various page archive
- Spot your cursor toward the start of the page you need to duplicate.
- Snap and drag the cursor to the base of the page you need to duplicate.
- Press Ctrl + C on your console. Tip: Another approach to duplicate your feature content is to click Home > Copy.
How would I fix a wrecked Word document?
Reformatting a Document with Messed-Up Styles
- Open the document.
- Ensure the Styles sheet is open.
- Snap the Options interface at the base of the Styles sheet.
- Using the Select Styles to Show drop-down rundown, pick In Current Document.
- Using the Select How List is Sorted drop-down rundown, pick Alphabetical.
- Snap OK to close the exchange box.
How would I remove text formatting?
Utilize the Clear Formatting choice to free the formatting from a segment of text or the entire Word document.
To begin, click the text from which you want to remove formatting in Word, at that point click Edit > Clear > Clear Formatting.
Any formatting applied to the chosen text will be removed.
Why is Word changing my formatting?
This happens because Word can “assimilate” express formatting changes into the basic style.
At the point when this happens, some other document elements that pre-owned that style naturally change to mirror the recently applied format.
Pick Styles and Formatting from the Format menu. Word shows the Styles and Formatting task sheet.
What does Clear Formatting mean?
“Clear formatting” removes any formatting -, for example, strong, italic, underline, section foundation shading or line, line dispersing (that varies from your “Typical” default style), superscript, addendum, and strikethrough – that you’ve applied to a word or passage or document.
How would I remove all formats of characters?
The Clear Formatting command removes the ALL CAPS text format yet doesn’t change the instance of text you made by using Shift, Caps Lock, or the Change Case command in Word. Another key blend for Ctrl+spacebar is Ctrl+Shift+Z.
Recall that Ctrl+Z is the Undo command.