
Isolating the vocal track from a multitrack recording is a typical practice, ordinarily embraced to deliver what is regularly referred to as an “a cappella” (however spellings change). A Cappella is used in numerous contexts, most outstandingly by remix craftsmen producing remixed versions of a given melody.
There are a few strategies for producing a cappellas, just one of which is conceivable in Audacity, a free sound editing tool for Windows and Mac OS X.
How To Isolate Vocals in Audacity?
The capacity to play out this strategy is constrained by the way that it requires an instrumentals-just version of the melody from which the vocals will be isolated.
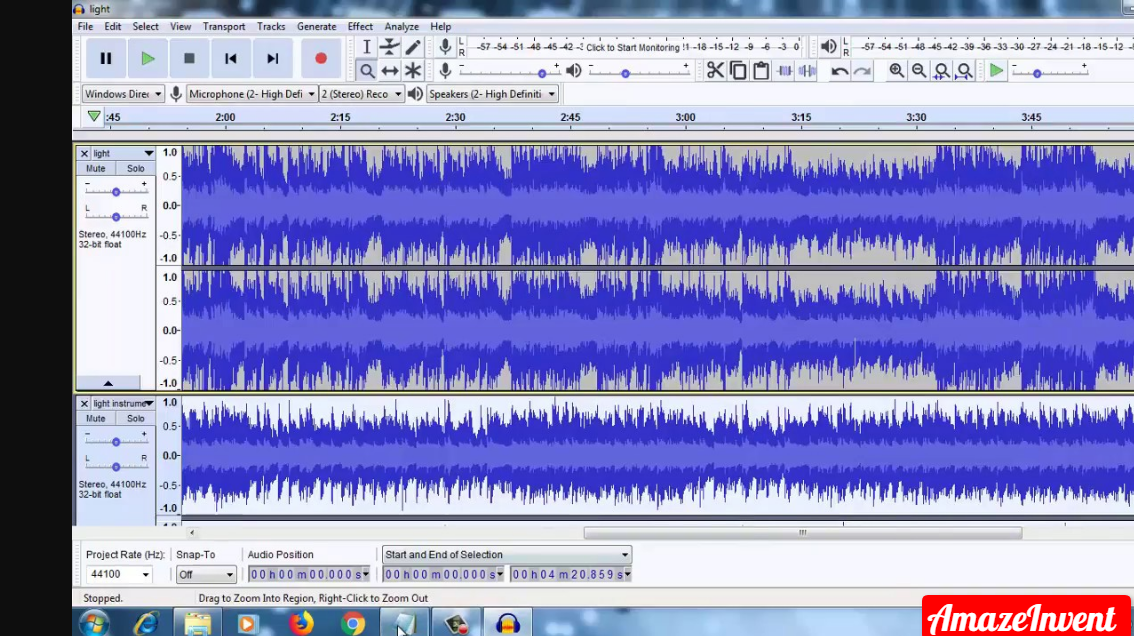
Step 1: Launch Audacity. At the point when its interface shows up, click on the File menu and select Open. A document selection exchange will show up. Explore to the version of the tune that includes the vocal track you need to isolate and double-click it. Audacity will put the tune on a track in its course of action zone.
Step 2: Click on the Project menu and select Import Audio. Find the instrumentals-just version of the melody in the document program and double-click it. The instrumentals-just version will be instantiated on a second track underneath the first.
Step 3: Use the Zoom In tool to zoom in on the tracks anytime in the timeline until the waveforms related to them are decreased to a single, wavy line running across the track. The waveforms ought to show up about indistinguishable. They should be adjusted unequivocally on the timeline in a request for the vocal detachment procedure to work.
Step 4: Select a peak in the waveforms that is indistinguishable in shape on the two tracks. This will be especially easy at those points where the vocalist doesn’t sing.
Step 5: Use the Time-Shift tool to adjust the tracks as correctly as could be expected under the circumstances. The Time-Shift tool is gotten to by clicking the double-finished arrow symbol in the toolbar. Click-hold and drag one of the tracks left or right in little increments until the waveforms are adjusted. On the off chance that they are not adjusted unequivocally, the vocal seclusion procedure won’t work effectively.
Step 6: Click on the track header for the instrumentals-just track to make it the focal point of the application, and pick Select All from the Edit menu. The whole instrumentals-just track will be featured.
Step 7: Click on the Effects menu and select the Invert function. The waveform for the instrumentals-just track will be flipped vertically.
Step 8: Click the Play button. Because the instrumentals-just track is lined up with the first track and inverted, it will quiet all indistinguishable sound information in the first track completely, leaving just that sound information that the two tracks don’t share. Accordingly, the vocal track will be almost completely isolated from the track.
Step 9: Save the undertaking by clicking the File menu and selecting Save. You will presently have a usable a cappella for use in future tasks.
Read more: How To Increase Microphone Volume In Windows 10?
How Can I increase vocals in audacity?
- Open Audacity and import the vocals you need to make clear by clicking “Document,” selecting “Import” and selecting “Sound.”
- Select the sound record on your PC that speaks to the vocal you need to make clear and click “Open.”
- Click “Effect,” select “Evening out” and pick the “Realistic Equalizer.”