Power is one of the common problems that Rumba owners face. did you face Roomba charging error 5? Most of the time, you will find landlords complaining about one thing or another.
So, without further ado, here are some common mistakes and corrections.
Roomba
To be very honest, who loves vacuuming nowadays? There are a lot of responsibilities and tasks that people have to look after and complete in daily life.
And even if people vacuum by themselves, then even the best vacuums created with promises of ease of use and convenience take a lot of room space and most importantly they consume much time for the people who are busy with their family, job and other works.
To solve these problems, the problem of room space and most importantly the problem of time, robot vacuum were invented.
The company named iRobot is said to be producing the best vacuum robots ever. Namely, iRobot has fueled the increase in these vacuum robots.
Roomba, introduced, designed, and invented by iRobot, is a series of autonomous robotic vacuum cleaners.
Yes, Roomba is the best vacuum robot ever been made. A wide range of Roomba automatic robotic vacuum cleaners was one of the first to hit the mainstream.
iRobot
iRobot is still designing and inventing new models of Roomba and they keep modifying Roomba, making it better than ever.
And still, iRobot is offering some of the best vacuum robots for you. No doubt that these products are not mostly cheap, they come at a heavy price.
But whenever a new model of Roomba is introduced in the market, the older models of that series drop in price but they are still worth buying.
Though there are other companies as well who have designed automated vacuum cleaners, they are a little senseless, they bounce around your room, bump into walls and furniture.
But the Roomba autonomous robotic vacuum cleaners are in the next level in the aspect of vacuum intelligence.
Roomba has a set of very intelligent sensors, those sensors help the Roomba to navigate the floor area of the home they are in, and they clean it very well.
The solution to it: Ifixit
Roomba’s intelligent sensors are capable of detecting the presence of obstacles; they can detect dirty spots on your floor and can sense abrupt drops for securing itself from dropping down from some height or the stairs.
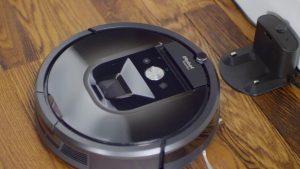
Roomba consists of two independently working operating side wheels.
Those side wheels allow Roomba to rotate at 360-degree in place. And it has 3 pronged rotating brushes that can sweep remains, garbage from square corners to the cleaning head.
Most of the Roomba series models had disc-shaped, 34 cm in diameter, and less than 9 cm in height. The intelligent sensor, contact sensing mechanical bumper is on the front of the unit. That contact sensing mechanical bumper has an omnidirectional infrared sensor at the top of its front center.
MODELS AND SERIES OF ROOMBA
There have been seven generations of Roomba units until now, as per the reports. The following are the seven generations of Roomba.
- The Original and 400 series
- 500 and 600 series
- 700 series
- 800 series
- 900 series
- i7 + and e5 series
- S series
The Original and 400 series
This is the very first series of this wonderful product[ct namely Roomba, designed and invented by iRobot.
It was first introduced in September 2002. These first-generation Roomba vacuum robots had three buttons for the size of the room. There had a total of 3 models invented in the first generation.
And later on, the second-generation Roombas had invented, known as the 400 series later. The second-generation models did replace their predecessors in July of 2004.
They did add some changes as well, a larger dust bin, improved configuration, and intelligence that calculated the room size.
500 and 600 series
In August 2007, the third generation, 500 series of Roomba vacuum robots had introduced.
In this series, they included a forward-looking infrared sensor to detect obstacles, control its speed to reduce it whenever needed, improved mechanical components, and smoothen operation capabilities had added.
After 5 good years, in August 2012, the 600 series was introduced. That added the aerobic bin and it advanced the cleaning head.
And for much more intelligence, in 2017 they released the 690, in which WiFi connectivity was available.
700 series
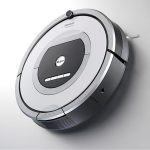
This series was introduced in May 2011. The 701 series was mostly similar to the 500 and 600 series, but it included some improvements, like a more robust cleaning system, a much-improved aerobic bin with HEPA filter and they improved the battery timing as well.
The 700 Series model Roombas were a little different in technology and accessories. There were four models introduced in this series, Rooba 760, 770, 780, and 790.
800 series
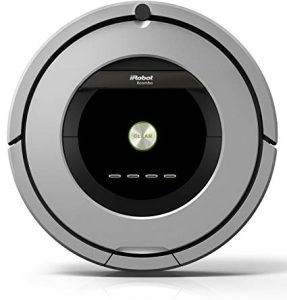
In 2013, iRobots introduced the 800 series of Roomba autonomous robotic vacuum cleaners.
This series is similar to the 700 series and its original models, but no doubt it has much modern and updated technology. It has a major update of the airforce performance cleaning system, it has enhanced five times more powerful than the older series.
And a new feature had introduced as well, the iRobot XLife battery.
900 series
In September 2015, the Roomba 980 had released. This new 980 model contains a new feature (VSLAM) visual simultaneous localization and mapping navigation system.
This new feature allows the Roomba to clean the whole level of the home more capably.
i7 + and e5 series
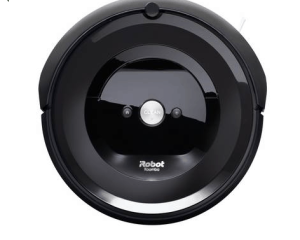
iRobot introduced a new Roomba series with two new models in September 2018.
The Premium i7+ and more like basic the e5 model. These two models have their new enhanced features.
S series
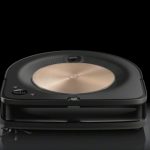
It was the end of May 2019, iRobot introduced the very new and the latest models in today’s date the s9 and s9+ models. They have known as the smartest, most powerful robot vacuum yet.
These new S series have modified the design of the Roomba as well, it now features a “D” shape new design and corner brush for optimized edge cleaning deep into the corners and edges.
It features a new anti-allergen system that helps clean all the allergens, and many more useful and important great improvements.
Read more: iPhone Says Headphones Are In When They Are Not
Solve Roomba charging error 5
You spend a lot of money on buying this expensive robot, you have had your robot for a while and it is doing its job very well cleaning all the house for you without any efforts by you and suddenly if it is flashing a warning light then you might get worried and it is worth concerning.
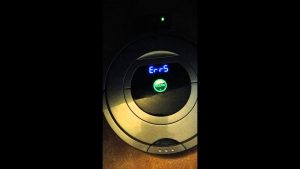
The “ERR5” or “Charging Error 5” is something people freak out about.
The lucky part is that this charging error 5 is not something to have much worried about and to be freaked out of, it can be easily solved.
This charging error 5 means that your robot’s battery is not charging properly.
This can occur when you use alternative batteries for your Roomba Robots.
You must use iRobot batteries only. And if you face this issue while using the genuine iRobot battery then the first-ever step you should take is to check your battery contacts and charging contacts.
Steps
If it is okay, then follow the steps I am going to tell you below.
- The first step you should take is to disassemble and open the Roomba. Make sure nothing is blocking the battery contacts.
- The second task you should do is to clean the battery contact points and remove any garbage, trash, or dust that may be causing the charging issue to your robot’s battery itself. Perform this step with a clean and dry cloth. You may see the green points on your robot’s battery, they are the contact points.
- The third step is to check the Home Base charging contacts if there is any debris or dust as well. Clean it just like you did with the battery charging points. Most importantly, use a clean and dry cloth.
- Step four is to check and test the results. Assemble it as it was. Try charging your robot vacuum again to see if these steps helped you and your Roomba out. The majority of people have got their problem solved with these steps I provided to you. And if it still shows the charging error 5, then you may try to repeat the steps one more time but much carefully this time and make sure nothing had missed.
- If the debris had removed, the batteries are clean and the contact points are clean and clear as well, but still, the problem stands and the charging error 5 is still there, you should contact the iRobot support team for assistance. They will surely give your vacuum robot a professional repair.
Roomba by iRobot has now become necessary for a lot of people who do not like vacuuming or are busy with their busy schedules in-home or in-office work.
Roomba helps you a lot, it cleans the house for you, all the corners, edges, and it keeps them clean, saving you a lot of your precious time that you can spend on your family, friends, or work.
How to fix Roomba charging error 5 after 30 minutes?
One of the most frequent errors of the Roomba device is error 5. This error is raised when one or both sides of the wheels can not turn. This is indicated by the Roomba saying “Error five (5).
Spin Roomba’s side wheels to clean.” Other than that, some models of the Roomba will play a two-tone “Uh-Oh” sound followed by five beeps.
This answer will show you how to fix this error.
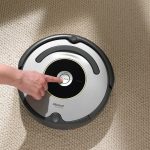
- First of all, push the wheels up and down several times. This will ensure that any debris that may have been stuck in the wheels is removed
- Turn both wheels with your hands to ensure they turn freely and that each wheel exhibits the same amount of resistance.
If your error still doesn’t go away, you might need a replacement for the wheel module, for which you will have to contact the iRobot store.
How to fix Roomba keeps saying charging error?
Charging error 5 means that your Roomba’s system charging is not working properly. This article will show you how you can solve this problem.
So without further ado, let us get straight into it.
- Firstly, you will need to be sure that the battery your Roomba is using is an authentic iRobot battery.
- This is because, in the case of counterfeit batteries, charging issues are inevitable.
- After making sure that your batteries are authentic, check whether there has been any buildup of debris or dirt on the charging contacts of the robot.
- If you find any buildup of dirt, use a lightly dampened melamine foam such as a Magic Eraser to remove debris from the charging contacts.
- Now, place the robot on its home base so that it can charge. If the issue is still not resolved, please contact iRobot customer care.

