

Why do you need to make a Discord Bot? Are you very confusing and difficult to do a job Maybe Not? Have you ever done Discord Bot? Let’s have tips on how to Create A Discord Bot?
If you are one of those people who know coding and a little bit of programming, you will do the job much conveniently then.
For the remaining people who don’t know anything about programming and all then leave it to me, keep reading the article, and do follow all the steps accurately in the manner as I will be describing them later in this article.
Before we jump and start talking about the procedure of how to create a discord bot, I want to share with you everything you need to know about this discord service. Are you good with that?
I hope that you are good with that because there are many people here reading my article that are new to Discord and its services.
That is why I think that we should have a talk about discord first and then we will get onto the procedure of how to create a discord bot.
Discord

For all the people who are new to discord, it is a real-time messaging platform that calls and recognizes itself in the world as an “all in one voice and text chatting messenger for gamers.”
Discord has a very professional interface that is very easy and convenient to use, and it has super extensive and exceptional features.
People all around the world and discord itself have been experiences rapid growth in the usage with great reviews and there is no doubt that it is becoming an increasingly popular service even among the people who have very little interest in playing these video games.
In a year only, between May of 2017 and May of 2018, the user base of discord has exploded from 45 million users to a number greater than 130 million users.
If you are a chatbot developer and you talk about the features of Discord, then there is one feature that will attract you the most than any other attractive features of Discord. That one feature is the “Programmable Bots.”

These programmable bots are designed to help to join together Discord with you, me, and the whole world, and it provides the users with a more engaging and excellent experience.
These bots are present everywhere on Discord and they provide you with a wide range of services for your ease, services such as moderation assistance, games, music, internet searches, even payment processes, and many more services that will surely save you much time and help you in a very good manner.
User Interface Of Discord
The way Discord presents itself to the bots is conceptually very similar but it is non-visual of course. I want to share with you a fact that many people don’t know about Discord.
If you see it technically, so it is possible to run a Discord bot inside a regular account of any user with a little bit of modification only, but you should keep in mind that it is prohibited and forbidden by the terms of services of Discord. Discord bots are required and designed to run in bot accounts only.
The User Interface of Discord on the desktop application is virtually just as same as the official webpage of Discord, as it is packaged with Electron.
Discord application for iOS is built with React Native and on the other hand, the Discord application for Android is a native Android Java code.
I am going to break down the user interface of discord for you. So you get to know which option is for what specific purpose.
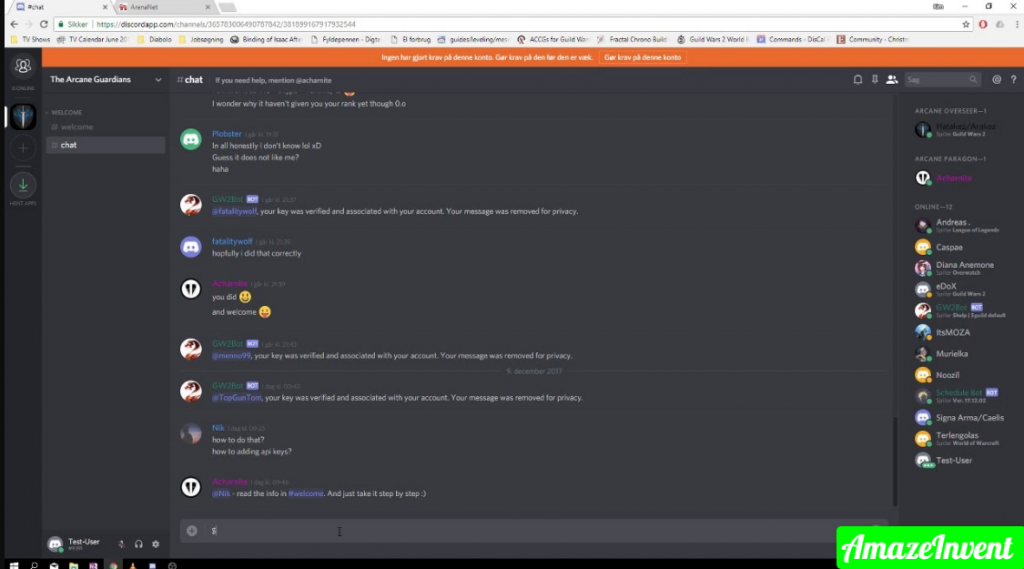
Server List

On the very left side, you will see the list of servers that you are a member of. You guys would be thinking what a server is, right? A server represents a group of users who can interact with each other within only one channel or more channels in the server as well.
A server on Discord is managed by the person who created it, or the creator can select staff and choose to delegate responsibilities to any other person from the group as well.
Many people have the Discord API server at the top of the server list. On the Discord API server, you can get help and talk with other developers as well.
On this server list area, below you will see a button to create a new server. I recommend you all to create a new server on which you will be able to test the bots you will create later through this article of mine. Creating a server is very easy; you can do it with a few clicks only.
Channel List

On the right side of the server list, you will see the list of channels for the server you are currently viewing or inside.
For example, if you are in the Discord API server, you will see all the channels regarding the Discord API server only.
Channels are capable of being broken into a random number of categories. For example, if you see the Discord API server, the channel categories there include INFORMATION, GENERAL, and LIBS.
Each channel of every server functions as a chat room where you and all the users can discuss whatever topic the channel is dedicated to.
The channel which you will be viewing currently will have a lighter background and the channels on which there will be new unread messages will have a white text color to discriminate it from others.
Channel View

The place where you can see what other users have been talking about in the channel you are currently inside and viewing. You can see one message here which is only partially visible.
Channel view is a list of links to support servers for libraries of individual Discord bot.
The administrators of the server can configure this channel so that the regular users no matter who that user is, cannot send messages in it. It is up to the administrators.
This channel view is used as a bulletin board by the administrators on which they post some important information so it is easy for all the members of that channel and server to easily view and that won’t be drowned out by chat.
User List

On the very right side of your Discord, you will the list of the users who are currently online on any server you are in. All the users are differently categorized and all their names have their different colors.
Users have organized into different categories according to their usage and roles they have. A user doesn’t need to have only one role to play, no, a user can have more than one role and most of the users are very often into different roles at a time.
Text Input

Text input is the area on your Discord windows where you can type and send messages only if you were allowed to do it. Since you don’t have any permission given by the administrator to type and send messages in any particular channel you want to send messages into, you cannot type in there.
User
User means your profile, you on the discord. You can see your username situated at the very bottom of the “Channel List” area.
The username you typed and chose for yourself will be visible to you there. You will see a number just below your username, for example (#9999), this number will be your discriminator.
How is this number a discriminator? Well, there may be many other users with the same username as yours, right? That is why this number discriminates you from all the users with the same username as yours.
For example, your ID is (User #9999) then there will be no other person with the same number as mine.
These are the most basic parts of the Discord user interface that you should know and there is a lot more as well.
It is very easy to start using Discord and to enjoy its services without even creating an account, so feel free to take out a minute of your precious time and have a visit to Discord.
Discord API
There are two separate pieces of the Discord API, namely the WebSocket API and REST API.
Both of these APIs have different functions, as the WebSocket API is used to receive events from Discord in real-time, while on the other hand the REST API is used to perform the actions inside the Discord services.
The WebSocket API

Just as I have mentioned just before this passage, that the WebSocket API is used to receive events from Discord.
These events include message creation, deletion of messages, user kick/ban events, updates for user permissions, and many more events.
The communication starting from a bot to the WebSocket API, on the other hand, is more partial, imperfect, and limited you can say.
WebSocket API is used by a bot just to request a connection, identify itself to others, heartbeat, manage the voice connections, and do a few more basic tasks for you.
All the events from the WebSocket API include a payload with the information that depends on the type of the event on your Discord.
Take it for example that all the events of ‘Message Create’ will be accompanied by a user object which represents the author of the message.
Though, the user object alone does not have all the information there to know about the user who has sent the message. Take it for example that there is no information included about the permission of the user.
If you want and require more information regarding the user, you could question the REST API for that. Keep in mind to access the cache that you should have built from the payloads you receive from the previous events.
Many events deliver payloads that are relevant to the permission of a user, including but not limited to the Guild Create, Guild Role Update, and Channel Update.
The REST API

The REST API is used by the Discord bots to perform most actions on Discord, such as sending a message, kicking/banning a user, and updating permissions of the users.
It is broadly analogous to the events which are received from the WebSocket API (all mentioned in the above paragraph).
I mentioned earlier as well that this REST API can also be used to query, to question for information, though, the bots of Discord most importantly rely on the events received from the WebSocket API instead and cache the information received from these WebSocket events.
Every time a Message Create event is received, there are several reasons for querying the REST API to get user information for it. Take it for example that it does not scale due to the rate limits of the REST API.
And it is also unnecessary in a lot of cases, as the Websocket API delivers all the necessary information for you which you should have in your cache.
It is very important for you and all the guys who are reading my article to have not the full but some understanding of every level of the technology you are using.
This was the only reason that I briefly described the Discord WebSocket API and REST API to you guys.
Now you understand almost every level of this Discord technology. And without any further wait, we should now get down to the business and talk about how to create a discord bot.
10 Steps To Create A Discord Bot
You must have heard about the angry hate-spewing Russian bots these days, but I’m not here to discuss those.
If you have come to this page then you must be found of how to make a Discord bot. These are not automated and furious trolls, but they are helpful scripts that can improve some of the irritation of running and moderating their Discord server.
If you cannot find a ready-made Discord bot that does what you want, then it’s time to learn how to make a Discord bot of your own.
Step 1: Set up a Discord account and download Node.js

Node.js is a JavaScript runtime that is free and open-source, and you will need it to make your bot work. Just download it at nodejs.org and install it before you get started on anything else.
You will also need a Discord account, and your server to test your bot. if you have not created one yet, just go here and create one.
- If you do have one, then log in to your account and open up the server where you want your bot to live.
- You will also need a text editor program, like Notepad++ on Windows to code with.
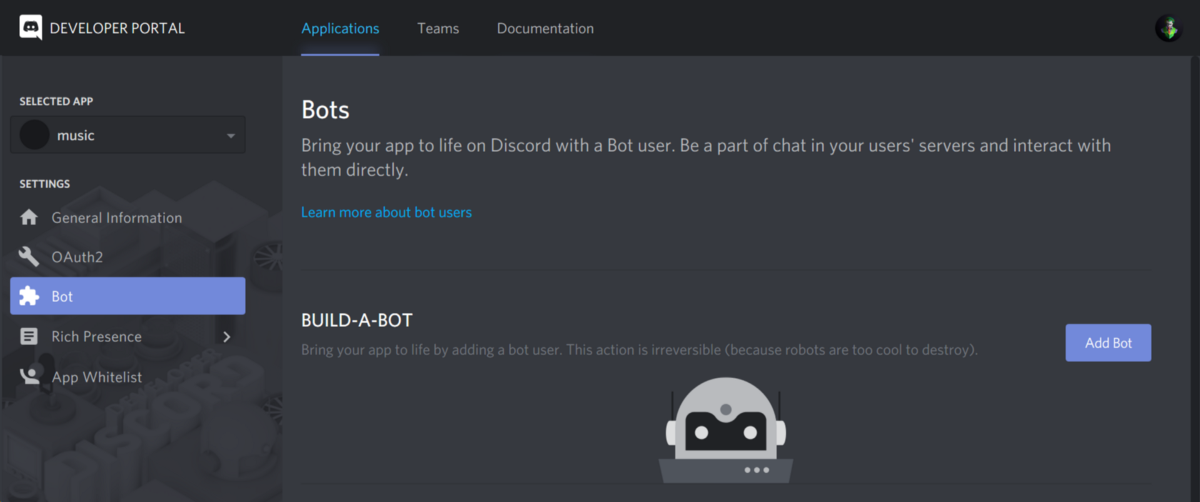
Step 2: Create your bot

Now you will have to create an “application” on Discord to make your bot work. This takes a little time, but it is not too difficult. The aim here is to get an “authorization token” for the bot so that Discord recognizes your code and adds it to the bot on its servers.
First of all, on the right-hand menu, click on Bot Once in the new menu, then click on Add Bot under the Build-a-bot option.
If you only have one application – which we just made – it should appear automatically. Or else, select it.
Step 3: Get your bot’s authorization token

Inside the bot marked App Bot User, look for words Token: Click to reveal. Click that link and you will disclose a string of text.
That is your bot’s authorization token, which allows you to send the code. Do not share it with anyone whoever has that token, it allows that person to create code for the bot, which means whoever has the token, can control your bot.
If your token has been compromised, the good news is that you can easily generate a new one with the link which is right under the token, which says “Generate a new token”.
You will have that token in just a second.
Step 4: Send your bot to your server
Now you need to scroll up to the box which is marked App Details and find your Client ID, which is a long number.
Copy that number and add it to this URL, in the place of the word CLIENT ID.
https://discordapp.com/oauth2/authorize?&client_id=CLIENTID&scope=bot&permissions=8
The final URL should be looking like this, but with your client ID number in it despite this fake one:
https://discordapp.com/oauth2/authorize?&client_id=000000000000000001&scope=bot&permissions=8
Just copy the URL with your client ID number in it into your browser. That will lead you to a website where you can tell the Discord where to send your bot.
Step 5: Create a “bot” folder on your computer

You can call it something simple, such as “DiscordBot” or “MyBot” so you know that what it is.
Step 6: Open your text editor and make your bot’s files

You will have to create three files for your bot from your text editor. In first, paste this code:
{

“token”:” Your Bot Token”

}
Rename “Your Bot Token” with the token which you generated before on your bot’s application page. Be sure that the token is inside the quotation mark.
Now save the file into the Discord bot folder which you made on your desktop, using the filename “auth.json”. Ensure that you do not save it as a .txt file – it will not work if it’s a .txt file instead of .json.
Create a new file, and put this code in that:
{
“name”: “greeter-bot”,
“version”: “1.0.0”,
“description”: “My First Discord Bot”,
“main”: “bot.js”,
“author”: “Your Name”,
“dependencies”: {}
}
Save the file as “package.json” in your Discord bot folder.
Step 7: Define your bot’s code
There is one more text file to create, and this is an important one that controls your bot’s behavior.
(Credits to Medium user Renemari Padillo, whose bot tutorial has helped create this one)
var Discord = require('discord.io');
var logger = require('winston');
var auth = require('./auth.json');
// Configure logger settings
logger.remove(logger.transports.Console);
logger.add(new logger.transports.Console, {
colorize: true
});
logger.level = 'debug';
// Initialize Discord Bot
var bot = new Discord.Client({
token: auth.token,
autorun: true
});
bot.on('ready', function (evt) {
logger.info('Connected');
logger.info('Logged in as: ');
logger.info(bot.username + ' - (' + bot.id + ')');
});
bot.on('message', function (user, userID, channelID, message, evt) {
// Our bot needs to know if it will execute a command
// It will listen for messages that will start with `!`
if (message.substring(0, 1) == '!') {
var args = message.substring(1).split(' ');
var cmd = args[0];
args = args.splice(1);
switch(cmd) {
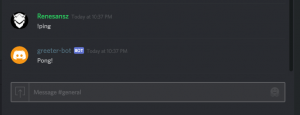
// !ping
case 'ping':
bot.sendMessage({
to: channelID,
message: 'Pong!'
});
break;
// Just add any case commands if you want to.
}
}
});
This code sets up a Discord bot that will respond to certain messages.
Especially, anything that starts with a “!” character. Particularly we’re programming the bot to respond to the command “!intro”, so if you type in this in your server while the bot is in it, the bot will respond with a programmed message.
Just be sure to maintain the single quotation marks around the messages.
Step 8: Open your computer’s “Command Prompt” and go to your Discord bot folder
On a Windows PC, you can get to the Command Prompt easily by clicking the Windows icon and typing “Command Prompt” in the file. When it’s open, type “cd” followed by the file path to your folder.
On my computer, the command looks like this. “cdUserPhil’s DesktopDesktopDescordBot”.
That will change the command prompt line to include the file path to your folder.
Instead, you can navigate to your folder in Windows and hold Shift when right-clicking on a blank area of the folder, and select Open Command Prompt.
Step 9: Use the Command Prompt to install your bot’s dependencies
Now you will have to make use of Node.js. In the Command Prompt, with your Discord bot folder in the file path line, type
“npm install discord.io Winston – save.”
This will automatically install the files which you need for your Discord bot into the folder directly.
You can also use the following command line prompt to install additional dependencies: npm install
Here is the whole code: Github
That should offer you all the files you need.
Step 10: Run the bot
This should be everything. To run your bot, type “node bot.js” in the Command Prompt (be sure you are still navigated to your Discord bot folder).
Now go back to your Discord server and try testing your bot by typing! intro,” or “!” followed by whatever you made your prompt message in your “bot.js” file.
If everything is correctly done, your bot should instantly return the message you coded for it.
Congratulations! You just made a Discord bot.