
Here at WPC, we’re dedicated to making sure that stress test your graphic card now.
What if you guys buy a graphics card and after a while, you find out that it was buggy and now it’s dead? That will terrify you.
Or suppose you are out to buy something brand new, after buying that, the first thing you will do is to inspect it and then check it, right?
Just as buying all these things to have a good gaming experience, to test your graphics card is important as well. This is to maintain stability and to keep checking if your GPU is okay or not.
If you guys don’t know what a GPU Stress Test is, then no need to worry, I will tell you about what is a GPU stress test, what tools can you use to do this stress test and then at last, what is the procedure of this stress test.
So first of all, you guys should know what a GPU Stress Test is.
What is the GPU Stress Test?

These are several applications that provide you the facility to test your Graphics Processing Unit (GPU) by pushing it to its absolute limits. These applications are used to check whether how your card is reacting to all that high-level power concluded at a time.
These applications utilize the processing power of your GPU, using all the electric power which is being provided to the graphics card.
All these functions are done while pushing the cooling and temperatures of your GPU as far as they can go.
Many people use the practical application to stress test their GPU, like high-end games, etc. but they won’t stress your graphics card to the extent.
No doubt they will surely push the limitations of your Graphics card but not to the actual point where your GPU is at crashing risk of overheating your system. This is where an actual stress test ends.
A stress test is built with a very different idea. It is made to check out whether your Graphics card will stand good during the normal usage and the intensive usage or it will crash and overheat.
This test lets you know the actual limits and durability of the Graphics card you have in your PC.
There is only one way for your Graphics card to pass this way and that is, to keep running without crashing, without overheating and without any issue.
Some people are trying to find a stable overclock, this test is made particularly useful for these types of people. That is why this stress test is sometimes called a graphics card stability test as well.
Not only for this, if you have various troubleshooting problems that probably occur while upgrading components, might this test help you.
So what do you think? Would you try this stress test on your Graphics card and push it beyond the limits? If yes, then continue reading this article.
When a person buys a computer or a new graphics card then it is of paramount importance to check if it’s good or not, so I have managed to classify some great tools for you to check out your graphics card that whether the graphics card you have bought is durable or not.
Some tools will help you to perform this stress test with your graphics card. Without any of these tools, you won’t be able to process and test your Graphics Processing Unit.
All of these tools which I will mention below in this article are safe to use so do not worry about anything at all while using these tools for a Stress test for a graphics card.
Unigine
Unigine is known for creating one of the best gaming engines all over the world and along with these, it offers some application tools for gaming tests which will help you stress test your Graphics Processing Unit to beyond extent.
Some great and popular tests by Unigine are Superposition, Heaven, and Valley.
You can select any of these tests to perform and check the durability and stability of your Graphics Processing Unit (GPU). If you want to go and fully stress your GPU beyond the limits, then go with Supervision.
This tool provides you with a very demanding test that delivers advanced visuals that are created by the powerful and well known Unigine engine itself.
This test consists of 900 interactive objects with dynamic lighting technology and VR module testing.
With these tools, while processing this test, you can even monitor the usage of your Graphics Processing Unit (GPU), temperature, power supply, cooling system, frames per second (FPS) count, and many other things which are worth considering while this Stress Test.
This Unigine and Superposition are considered a better option than high-end games for stress tests for your Graphics Processing Unit because these provide you with an interactive environment that most of these games don’t even have.
Unigine offers you with benchmark score as well, this allows you to compare the score your GPU made with other GPU systems around the world.
3DMark

This is another tool which is very popular among the people for stress testing purpose and it also provides you with benchmarking score facility.
Just similar to Unigine that I have reviewed just above this 3DMark, it brings some tests of a benchmark to measure the capability and status of your Graphics Processing Unit.
The most popular ones among these are Time Spy, Fire Strike, Tomb Raid, and more, but if you compare all of these, I find the TIME SPY as the most demanding and the best because it takes full benefit of the new DirectX API.
This great 3DMark tool puts an incredible and huge amount of load on your Graphics card to push it to the extreme level to check the stability and durability of your GPU to the extent.
This test is known to be the most intensive among other comparable graphics cards. It is that much intensive that, even the powerful GeForce GTX 1080 Ti came on to the knees just after a few procedures of this 3DMark test.
There are advanced graphical visuals on this 3DMark tests, along with lighting and shadow effects.
All of these features and options are for you to make sure the usage of your Graphics Processing Unit goes as high as 100%, to the extent. All of this to find out how much your machine is capable of.
As I have stated and mentioned above at the start of the review of this 3DMark that it offers a standard and modified benchmark score like on the Unigine.
This benchmark is used to gauge the ranking of your Graphics Processing Unit (GPU). It doesn’t matter who the manufacturer of that graphics card is, it will provide you with the accurate status of your GPU.
This 3DMark is one to use because it is equally powerful stress testing software for your Graphics Card.
FurMark
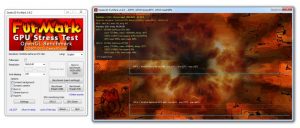
This is best for the Testing of Overclocks and General Stability.
Many of the people believe that FurMark is overkill for stress testing GPU and that is correct so. It offers a tremendous load on the GPU to the point where it can damage your hardware because of overheating.
Though, you can take the basic test of it which is a standard OpenGL test for measuring the GPU’s stability and activeness.
You can also provide a custom preset as such a resolution, dynamic background, screen mode, throttle time, and much more.
As the tests are highly advanced, you cannot monitor many of the essential metrics with the FurMark software. For this, you will have to use software such as MSI Afterburner utility to keep an eye on GPU’s usage and temperature.
To wrap up, just go with FurMark if you have the experience and specialization which is required in stress testing GPU.
The stress test component of FurMark offers you to test how well your graphics card is operating when it is under a heavy load.
When a graphics card has hardware issues they commonly fail when they are under heavy use and load.
To detect the GPU issues, you can use FurMark which will perform a stress test that will quickly overheat your GPU / graphics card.
When you are running this test, if by chance your computer freezes, then you will have graphical artifacts displaying on your screen, or other issues then this may indicate that it is an issue with your card or inadequate cooling.
It has a bonus; FurMark also includes a CPU stress test called CPU Burner that will quickly make your computer’s processor go 100 percent utilization and overheats it.
The use of this tool with a CPU temperature monitor utility offers you to test your CPU to observe and see how well it operates under this much heavy load and whether your cooling system is doing a good job or not.
Unigine Heaven
This is best for the Testing of Real-World Stability and Performance.
If you are looking for a free graphics card stress tool for more of a real-world scenario (that is very much prettier to look at), Unigine Heaven is a great place to start.
Despite having celebrated its ninth birthday, this benchmark is a favorite of many of the people, as a standard with which to compare the current-gen GPUs to previous-gen GPUs, as a tool for observing and checking the stability, and just a quite fun benchmarking tool.
Although most of Unigine Heaven’s features are completely free of cost, you will still need to spend a little bit of money if you want to make use of features such as automated benchmark looping, which is very useful for extended stress test scenarios.
If you are looking for something which is even more intensive (and built from the ground up for cutting edge GPUs), you can also try Unigine’s other stress testing software which is called Superposition.
Unigine Superposition
This is best for modern graphic cards and VR.
Unigine Superposition may not be as aesthetically pretty as a Unigine Heaven, but still, it is more technically demanding.
Unigine Superposition tests all types of advanced lighting and shading features; actually, it is built to bring even the likes of the GTX 1080 Ti to its knees.
If you are still using an older or a mid-range graphics card, nevertheless, you will probably get more meaningful outcomes out of one of the previous two tests that are recommended.
Like with the Unigine Heaven, Superposition is free to use but it has an automated looping for stress test purposes and VR testing which are both locked behind a 20 dollar paywall (which is not bad if you have already spent hundreds on the setup of a VR).
You can still use the free version for stress testing, but you will want to keep it for shorter stress test or return occasionally to re-run the process of a benchmark.
OCCT
As an OCCT is famous and popularly known for stress testing CPU, it can also torture the graphics card / GPU to its absolute edge.
You can use an OCCT to test the stability of your overclocking parameters such as voltage, frequency, and resolution. It installs OCCT’s version of the GPU stability test which is called the furry donut.
The graphics rendering engine is so powerful that over history, it has blanked out screens of computers that are powered by a major graphics card.
As an outcome, the test has revealed major design flaws in the architect of the graphics card / GPU chipset.
After considering that, the best part about the OCCT is that it is not just a stress testing software, but it also offers and allows you to detect GPU errors and monitor the active readings.
You can take the full advantage of the GPU: MEMTEST to find any errors in the graphics card memory. Overall, OCCT is a multi-purpose and versatile tool to stress test the GPU and you should also give it a try.
AIDA64 Extreme
Apart from the CPU test, AIDA64 Extreme also offers you a GPU stress test which is known as the GPGPU Benchmark test.
The AIDA64 Extreme has a system stability test that includes the GPU and you can easily run a series of graphically intensive tasks to drive the computer to its brink or edge.
AIDA64 Extreme offers a 64-bit multi-threaded stress testing module and uses OpenGL API to push the graphics card / GPU to its maximum capacity.
After considering that, the best part about the AIDA64 Extreme is how user-friendly this software is.
You will be offered all kinds of information even under heavy stress like power consumption, GPU usage, frequency, temperature, and much more.
In simple words, if you are new to this world and looking out for a simple tool to stress test the GPU then AIDA64 Extreme is a good start to go with.
Now that you are well aware of what a stress test is, and which tools are considered as the best to use to stress test your Graphics Processing Unit, it is time to learn how to run this stress test on your computer to check your Graphics card.
Before proceeding to the procedure, I must tell you that there is a possibility that your system can get damaged. It doesn’t happen mostly but still, a person should be aware of the outcomes. So if anything happens, we are not responsible for that. Do this on your risk and responsibility.
How to Stress Test your Graphics Card?
Step#1: SET YOUR OVERCLOCK
The very first thing you need to do is to go and set your overclock on your choice.
And if you are not overclocking and you just want to test the performance or stability of your Graphics Processing Unit, then just skip this step and jump to the step number#2.
Step#2: CLOSE ALL UNNECESSARY APPLICATIONS
You will have to close each and everything on your personal computer while performing this stress test.
If you have an emergency and need to use your PC during this stress test is being performed on your computer then a lightweight browser like OPERA can help you and it won’t create any problem with the stress test.
You will have to refrain from using such tasks which will consume the power of your GPU usage even a little, like using YouTube or Netflix for video streaming.
There should not be any kind of visual media consumption while the stress test is being performed or while doing benchmarks of any kind.
The reason behind stopping you from using your PC while this test is that you can run up your results and for some extremely rare cases, even crash your system.
While this stress test is being performed, there should be only one thing opened on your desktop, which is overclocking / monitoring software.
After you close everything, go onto step three.
Step#3: OPEN AND RUN THE STRESS TEST APPLICATION
What you need to do now is to open whichever stress test application tool you have downloaded and then click ‘RUN’.
Though there are other options which might make you feel tempted to change them, options such as resolution, full screen, graphics preset, and many more.
You can do the changes in these options if you like but I don’t find it necessary to do so for running these types of tests.
Your Graphics Processing Unit must still hit all of its usages and your temps should go as high as they ever can.
If you are using applications from Unigine, then I would recommend running this test in full screen at your local resolution. Make sure that the status, gauges, and all the readings are accessible and visible to you.
Step#4: RUN YOUR EST FOR A TIME BEING
At last, it is time to decide how long you will be running this stress test for your graphics card.
I am going to review you with the circumstances of three basic ranges to start with so that it might be easy for you to decide which one you are going to follow.
NOTE: If you are using the FunMark tool for this stress test then I should tell you that it is only recommended for Basic tests. You only have to run it for a maximum of 30 to 60 minutes and no longer than that because it can end up damaging your Graphics Processing Unit.
Basic Stability Run (About 30 Minutes):
This is the starting level, the basic test. If you are using FurMark, Heaven and Superposition, these should all crash if you will be having an unstable overclock or some basic problems with a cooling system with your GPU after it has been run for 30 minutes.
If your GPU has passed this basic level, then it is clear for any kind of general media consumption and average gaming sessions as well.
GREAT STABILITY RUN (About 60 Minutes):
If you want to make sure about the stability of your GPU for extended gaming sessions which can last up to 3 to 5 years, an hour-long stress test should reveal and decide if your GPU is good enough to support those long gaming sessions or not.
If your GPU clear passes this test, then consider your GPU to be clear for all the aspects regarding gaming.
GUARANTEED STABILITY RUN (About 8 Hours):
If you want to make sure about the guaranteed stability of your GPU as if your GPU will stand still and strong while facing all the situations and scenarios you put in front of it in the future then this test is recommended.
But this is only recommended if you are a marathon gamer, marathon streaming and if your GPU runs for a huge amount of time, for example for rendering or mining.
If you run this 8 hours test and your GPU clear passes this test, then you should probably be free of all the worries you can ever even think of.
How do I benchmark my GPU?
To start recording benchmark results, click ‘Benchmark’ at the top left of the screen or press F9 on the keyboard.
Heaven will now run several tests and then show your results in a new window. These results give you a score with your average, minimum and maximum frames per second.
Can Furmark damage my GPU?
Running it under controlled temps will not harm a GPU, but you can overheat and damage a GPU.
If the new cards and their drivers overheat, they control it by rotating it down, so it’s not a big deal.
How hot is the CPU?
Ideally, your room should be about 23 23 C / 73 F, but anything above 27 ° C / 80 ° F can be harmful to your computer.
What should be the normal operating temperature of your CPU? Your processor should not be hotter than 75 ° C / 167 ° F, nor significantly colder than 20 ° C / 68 F.
Should I insist on testing my GPU?
Ideally, when you are taking a stress test, you should use more measurements of your choice to monitor your temps.
During the stress test, you should expect the temperature to rise to 90 ° C (194 ° F), and the GPU usage to increase to 100 to.