


How to Test a PC Motherboard With a Multimeter
The motherboard of a PC provides the platform for the majority of the machine’s segments, allowing the use of complex hardware without requiring befuddling wiring schematics.
Testing or researching a PC motherboard should be possible at home, as a basic multimeter can be utilized to test different circuits and choose general electronic issues.
How to Test a Motherboard With a Multimeter?
How about we delve deeper into this and figure out how to use a multimeter while testing your motherboard?
For short circuits
We are going to talk about testing for short circuits first because it is a typical issue and may happen when there’s a flood of power.
- Switch the PC off and unplug it.
- Wait for several minutes so it chills totally and has no charge.
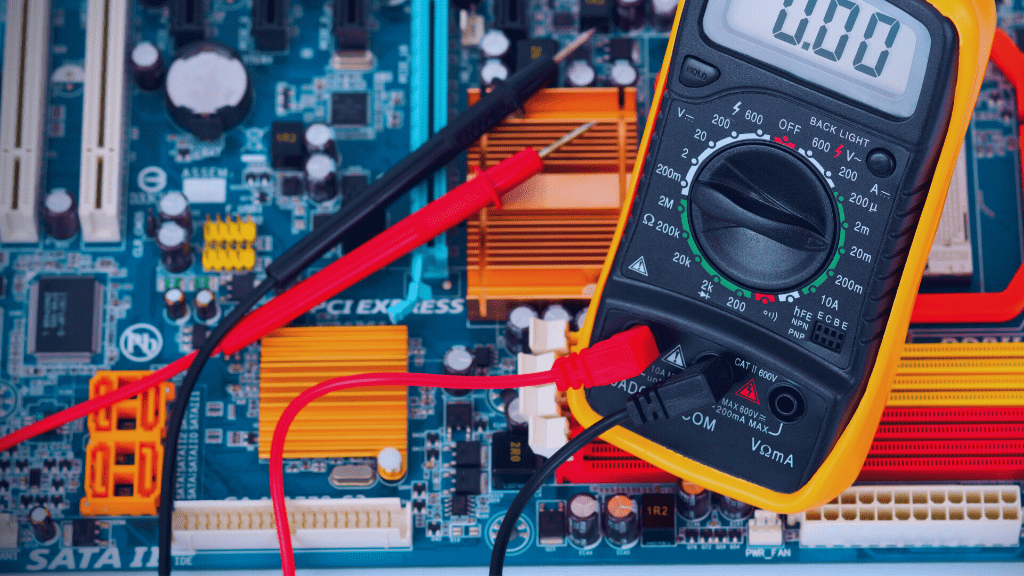
- Draw out your multimeter and adjust it to the lowest setting. This is usually 200 Ohm. To carry the meter to zero, you have to touch both the leads together. When you do that, test it with the skeleton to guarantee that it is as yet zero.
- Open your PC to discover the motherboard. Remove the ATX connector from it.
- The red lead goes to the PSU’s AC ground pin while the black lead stays on the chassis. The black wire pins should be on the DC connector. Indeed, even at this point, all the readings ought to be zero.
- Presently, guaranteeing that the black lead stays in its place, use the red lead to check all the hued wires. 50 or more is normal. Anything under 50 involves concern.
- You can also check further to discover faults. Remove the motherboard totally from your system. Allude to the ATX 20-pin chart to discover the PINs on your motherboard. Use the red lead to test each of the GND pins. 3, 5, 7, 13, 15, 16, and 17 must be zero. If you see any other reading, there’s an issue.
Read more: LineageOS on Your Android Device
Testing the DC Voltages
Step 1
- Make sure the 20-pin ATX connector is in and the PC is trapped to AC power.
- Set the multimeter to 20V DC.
- Using the black multimeter test, test the backside of the connector, and set the black test in contact with pin 15, 16, or 17 (GND pins).
Step 2
- Use the red test to test the accompanying pins (looking for the readings indicated in the parentheses):
- Pin 9 (Purple, VSB) ought to be at 5 V (any other reading indicates an issue with the PSU); and Pin 14 (Green, PS On) ought to be somewhere in the range of 3 and 5 volts.
- Press the PC power switch, and the PS_On value should drop to 0.
- Different readings indicate a faulty switch.
Step 3
- Use the red test to check Pin 8 (gray, Power_OK), which ought to be above 2.5 V; this signals that it is okay for the PC to start.
- Pressing reset should make the Power_OK reading drop to 0 and then climb back up.
Read more: Best Alternatives for Windows
Testing the PSU and Motherboard for Short/Open Circuits
Step 1
- Unplug the PC from AC power and allow several minutes for any excess charge to drain.
- Set the multimeter to the most minimal Ohm setting (around 200) and contact the leads of the tests together to zero the meter.
- Touch the two leads to the bare metal of the PC’s chassis; the zero reading ought to be the same.
Step 2
- Carefully remove the ATX connector from the motherboard.
- Keep the black test on the metal of the chassis and use the red lead to check the PSU’s A/C ground pin and the black wire pins on the D/C connector; these should all read zero.
Step 3
- Keep the black lead on the chassis and use the red test to check the values of the shaded wire pins on the D/C connector.
- All shaded wires should give a reading of 50 or greater.
Step 4
- Remove the CPU from the motherboard socket.
- Use the ATX 20-pin chart to allude to nail numbers to the board’s connector.
Read more: How to Change Your Homepage On The Mac?
How to check the laptop motherboard with multimeter pdf?
- The initial step is to check your PC charger is yielding the right voltage.
- Plugin the adopter and test the force connector, you get 19v so it’s fine.
- Plugin your multimeter tests into your multimeter, ensuring you notice the right extremity.
- Check the RAM chips by supplanting them with known-great ones.
- A multimeter must be utilized to test the IC dc supply voltage and to utilize the ohm reach to see whether the IC is shorted to ground or not.
- The first check is battery voltage and indeed it is 0V. For this reason, take an AVO meter (or Digital Multimeter) and select “Opposition”
- In the event that the number peruses somewhere in the range of 1 and 10 if the outcome is an issue that truly relies upon your laptop
- We discover results for the PC motherboard multimeter test.
- Disable external.
How to test a computer motherboard and CPU for failures?
The principal activity is a visual check of the motherboard. A typical reason for motherboard issues or disappointment is swelling or blown capacitors.
Check the top point of every capacitor to check whether it’s swelling or spilling, which is a sign the capacitor is blown.
You track down any swelling or blown capacitors. That is likely causing PC motherboard issues. A hard drive may offer you hints of failures, like blue screens or lost files. Yet a motherboard will just unexpectedly quit working.
- For the CPU, a visual check expects you to eliminate the CPU from the PC.
- When the CPU is eliminated.
- Check for bowed pins as an afterthought that is embedded into the motherboard.
- You track down a bowed pin, which is likely causing issues with the CPU and PC.
How to Figure Out if My Processor Is Damaged?
- Attach your PC to a plug and turn it on.
- Search for the BIOS maker name like Award, AMI, or Phoenix on your screen.
- As the PC fires up and afterward tune in for.
- The file number and arrangement of beeps that happen as your PC goes through a power-on individual test likewise called a POST test.
- The number and grouping of beeps that show CPU harm relies upon your BIOS producer.
- To allude to documentation that accompanies your PC or contacts a PC mechanics shop to decide if the POST is flagging CPU harm.
- Investigate the CPU fan to ensure it is running and if necessary supplant the fan.
for maintaining a comfortable environment in homes and offices.
air conditioner tune up air conditioner tune up.
777bet online casino.
Security is also a top priority for 777bet, ensuring a safe gaming environment.
Dive into the world of excitement with Juwa777 and win big!
Ultimately, Juwa 777 offers a blend of enjoyment, protection, and customer care that enhances user satisfaction.